Recipes From the Field: Ukrainian Easter Cakes
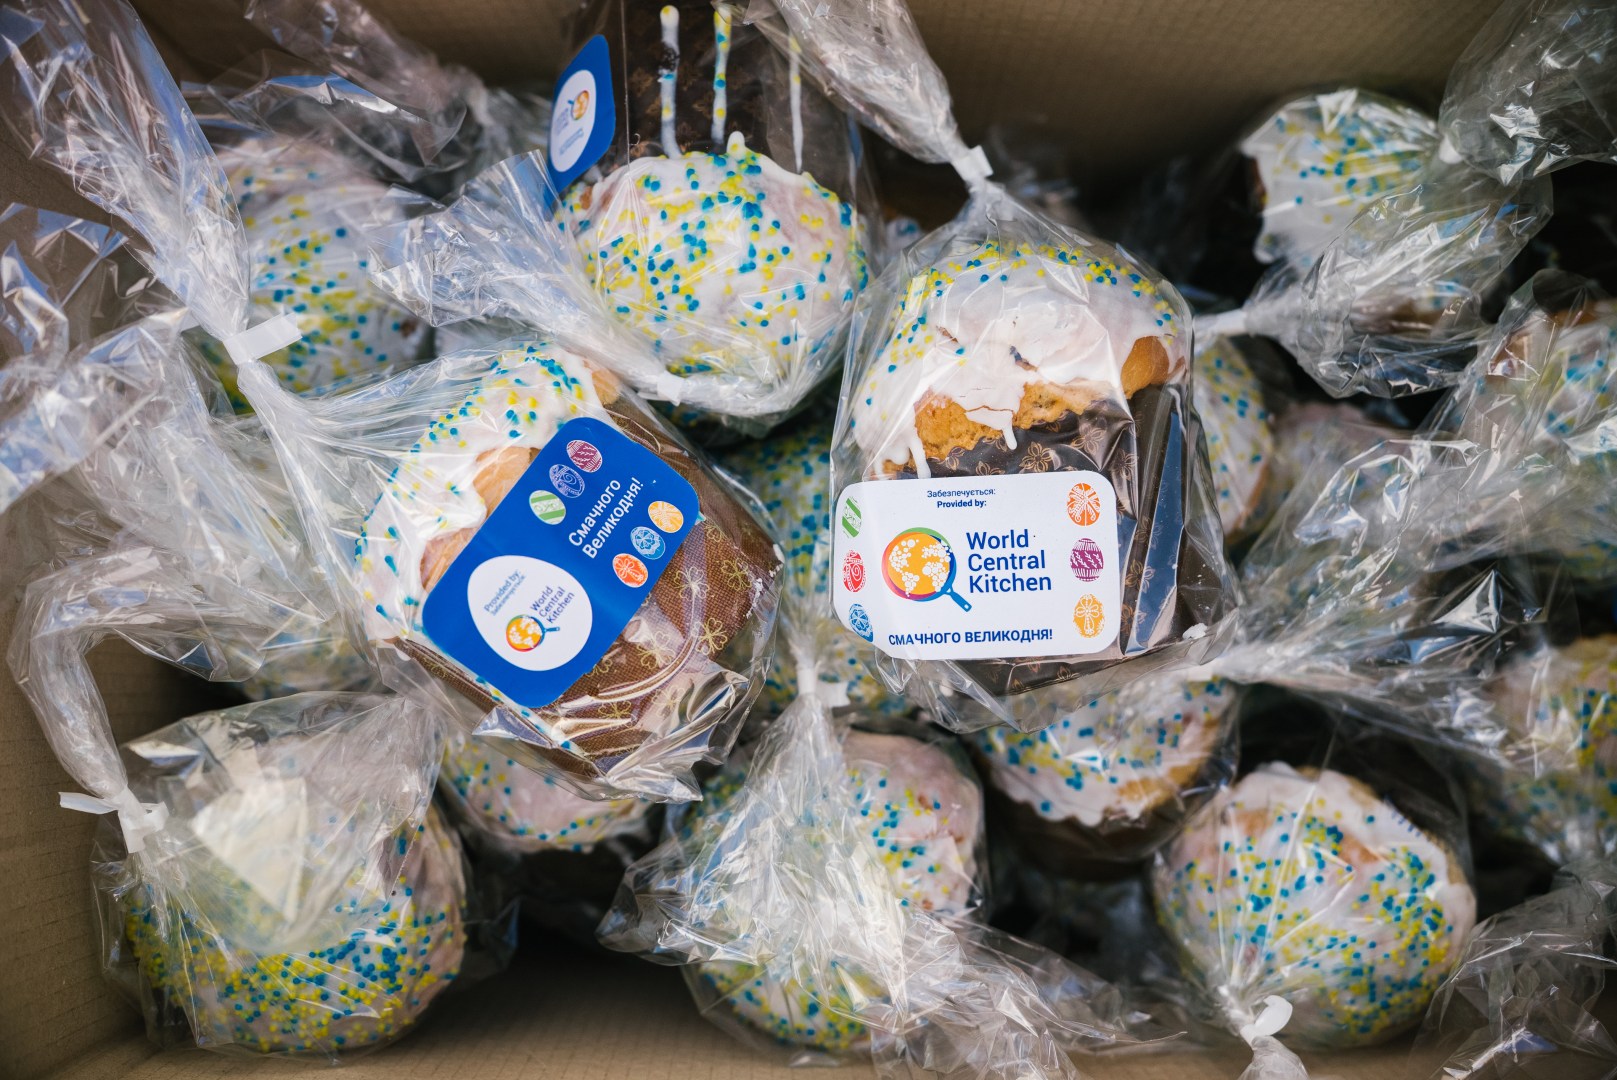
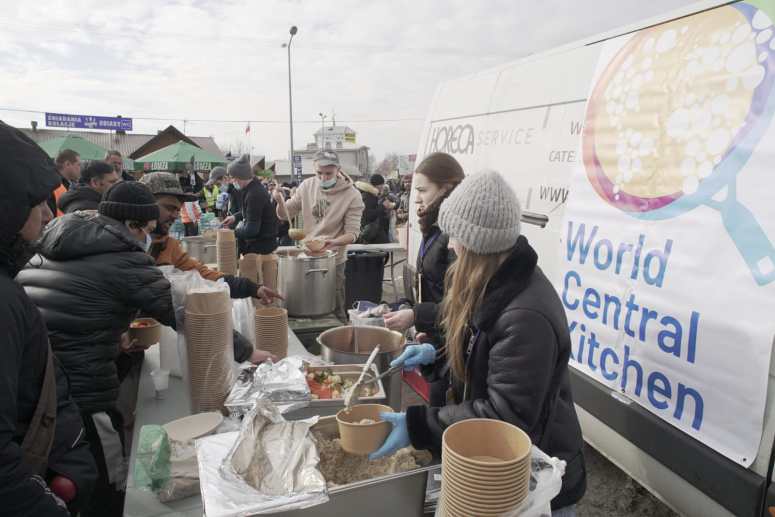
In Ukraine, families are observing Orthodox Easter this Sunday in the midst of war for the fifth consecutive year. The day holds profound importance for communities across the country—which is why our teams are once again serving paska, traditional Easter cakes with colorful decorations, so people can share a moment of joy and reflection.

Paska for Ukrainians is a symbol of goodness, care, love, and family warmth.
Yuliya
WCK Ukraine Response Director
The recipe for these colorful cakes is featured in the WCK Cookbook—and we’re sharing it here so you can enjoy a taste of Ukraine at home. This recipe came from our Ukraine Response Director, Yuliya, who learned it from her grandmother, who learned it from her grandmother.
PASKA – Ukrainian Easter Bread
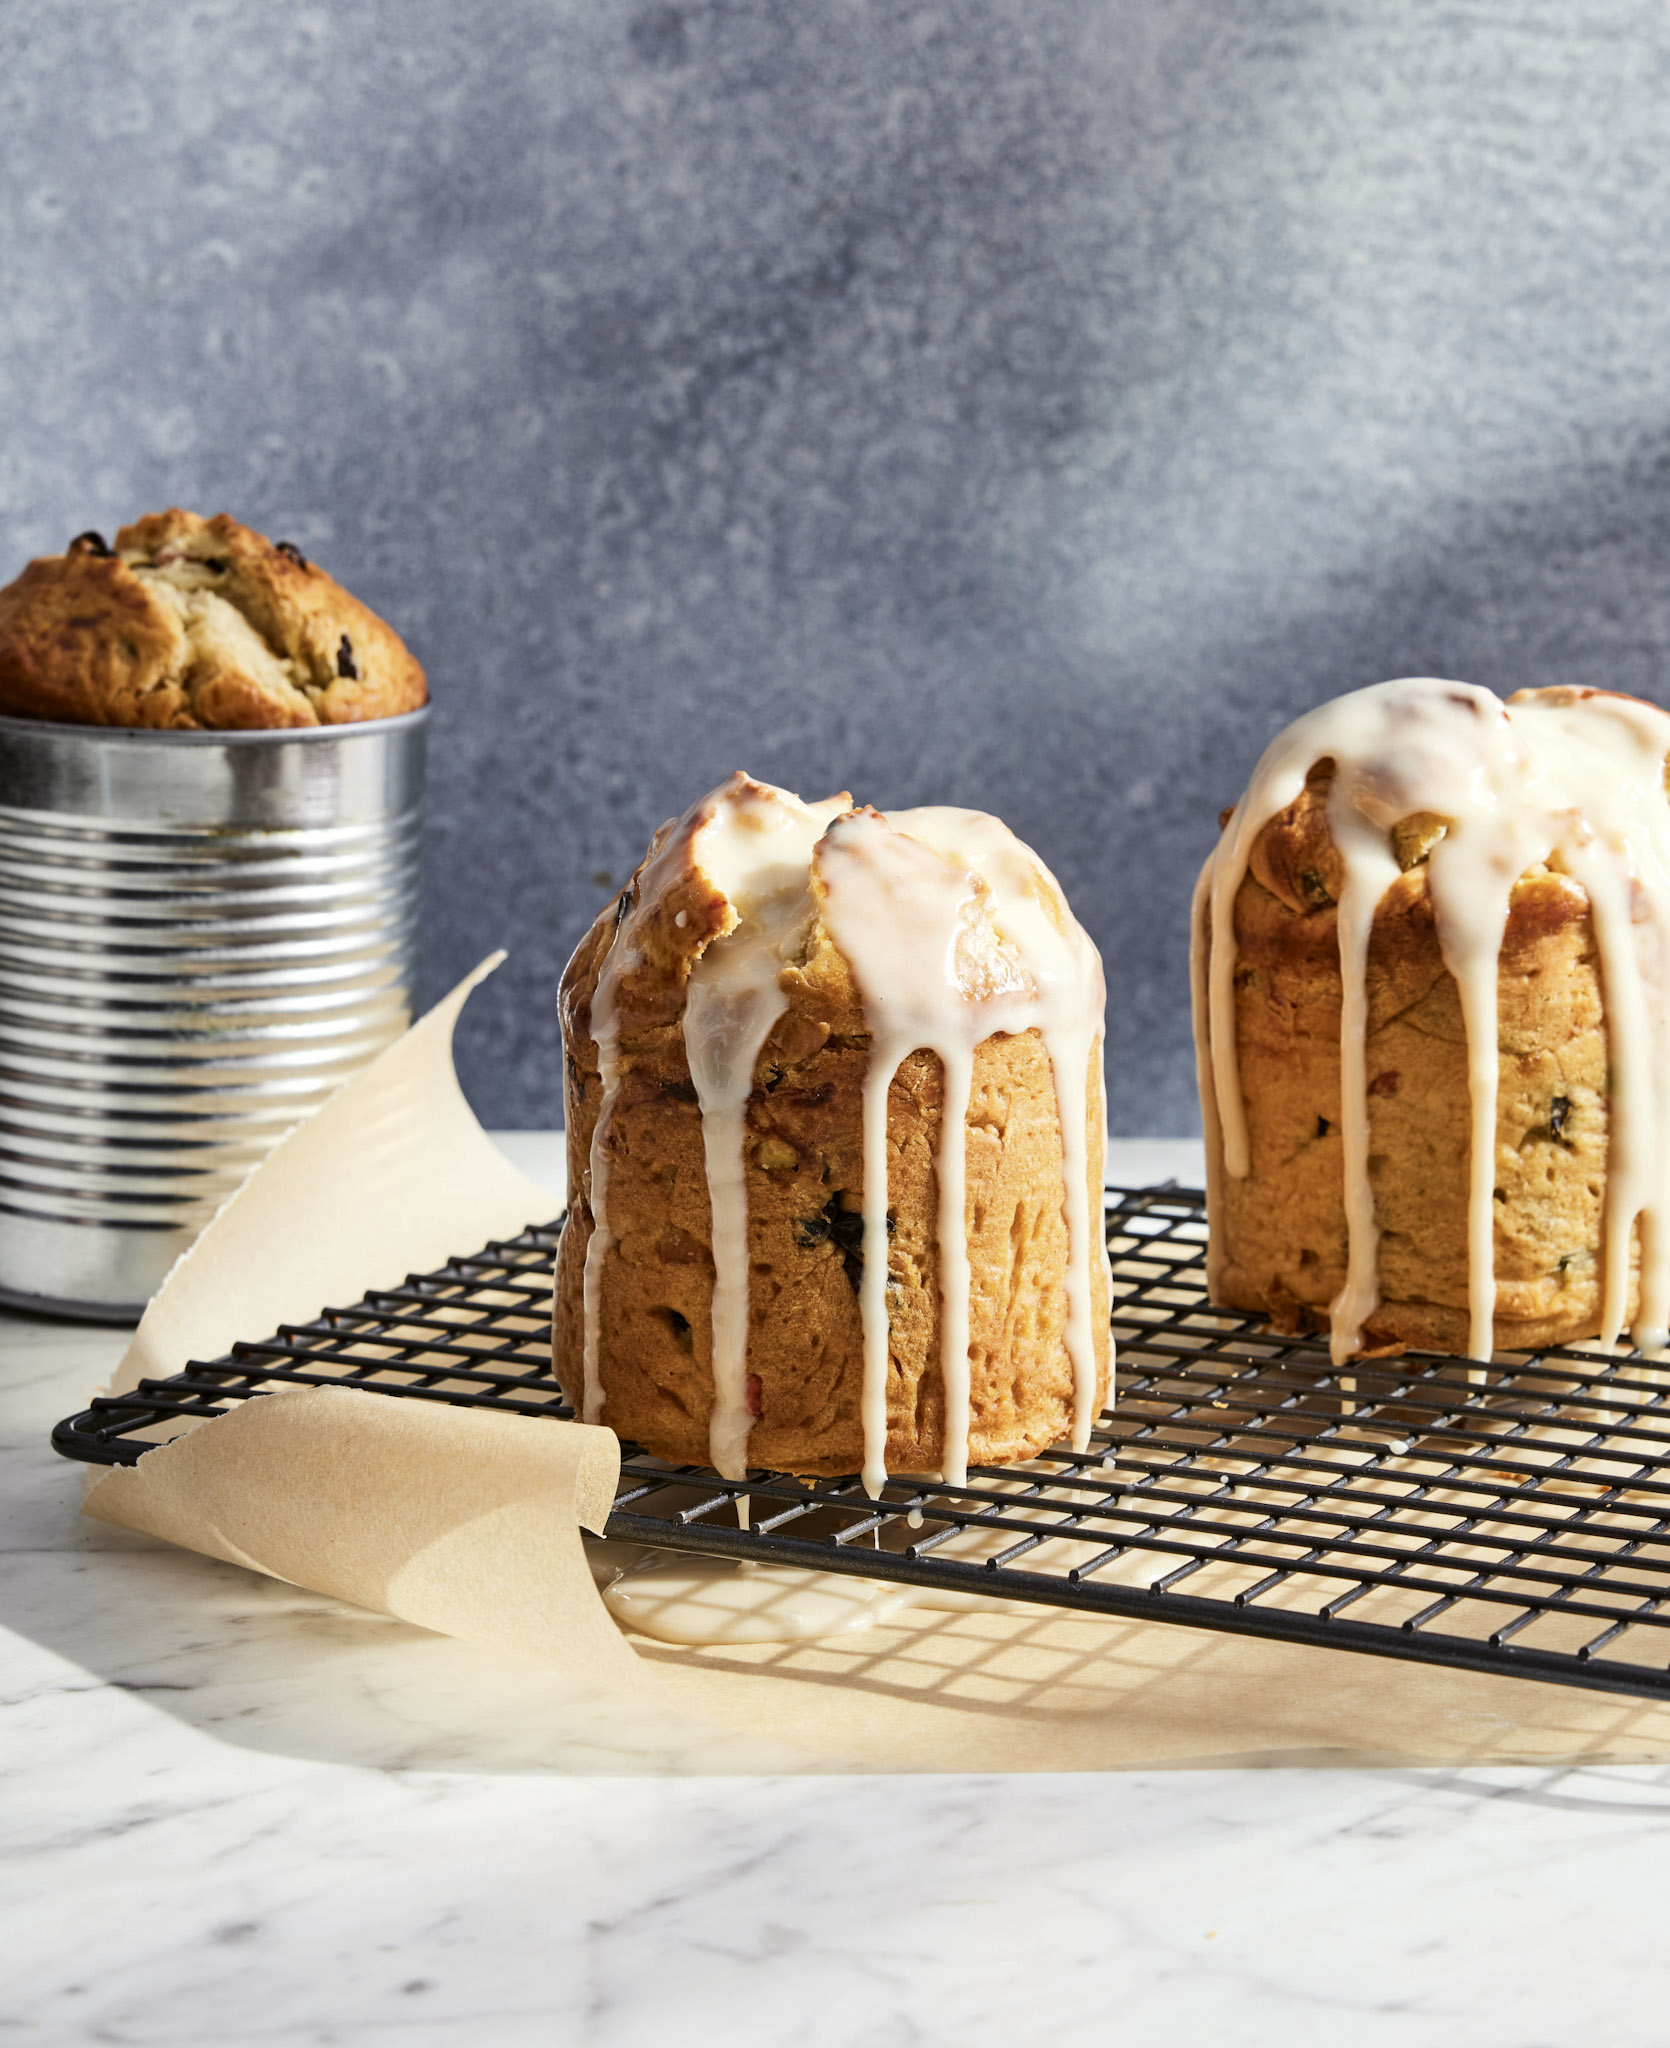
Makes 2 medium round breads or 3 tall cylindrical breads
Ingredients
Bread
- 1¼ cups (284 grams) milk
- 1 cup (200 grams) plus 1 teaspoon granulated sugar
- 2 tablespoons active dry yeast
- 4½ cups (540 grams) plus 2 tablespoons sifted all-purpose flour, plus more for kneading and shaping
- 3 large egg yolks
- 16 tablespoons (226 grams) unsalted butter, at room temperature
- 1 tablespoon kosher salt
- Oil for greasing the bowl
- ¾ cup (112 grams) raisins
- ¾ cup (112 grams) chopped mixed candied fruit
- Egg wash: 1 egg yolk, whisked
Glaze (Optional)
- 2 cups powdered sugar
- 1 teaspoon vanilla extract
- 2 tablespoons whole milk
- 1 teaspoon grated lemon zest (optional)
- Food coloring (optional)
Preparation
1. MAKE THE BREAD: In a small saucepan or in the microwave, warm 1 cup (226 grams) of the milk to lukewarm, about 110°F. Dissolve 1 teaspoon of the sugar in the milk and sprinkle the yeast on top, then mix in 1 cup (120 grams) of the flour. Let it sit, covered with a kitchen towel, in a warm place until it has doubled in size, 20 to 30 minutes—the time will depend on how warm your kitchen is.
2. In a stand mixer fitted with the whisk (or in a large bowl with a whisk), beat the egg yolks with the remaining 1 cup (200 grams) sugar until creamy and lightened in color, 3 to 5 minutes. Add all of the softened butter to the yolk-sugar mixture, mixing until the butter is well integrated, about 2 minutes. Add the remaining ¼ cup (58 grams) milk and beat for 3 more minutes, until the mixture is smooth and light.
3. Snap the dough hook onto the mixer (or use a rubber spatula) and add 3½ cups (420 grams) of the flour, the salt, the egg mixture, and the yeast mixture. Stir to combine all of the ingredients. The dough will be wet and sticky. Knead in the mixer (or transfer to a lightly floured counter and use your hands). As the bread is kneaded, moisture will be absorbed into the flour. If the dough still sticks to your hands, add more flour, 1 to 2 tablespoons at a time—the dough is ready when it doesn’t stick to the mixer or your hands, about 10 minutes in a mixer (longer by hand).
4. Once kneaded, shape the dough into a ball and place it into a large oiled bowl. Cover with plastic or a damp kitchen towel and let the dough rise in a warm spot until it doubles in size, 1 to 1½ hours.
5. While the dough is rising, in a medium bowl, combine the raisins and candied fruit and add warm water to cover. Set aside to hydrate for 20 minutes. Drain them and dry on a towel, then sprinkle with the remaining 2 tablespoons flour and set aside.
6. Also while the dough is rising, decide what you want your breads to look like—you can make 2 medium round loaves, which you can decorate or not, or 3 tall breads. If you’re making rounds, prepare a baking sheet by lining it with parchment. If you’re using 28-ounce cans (an empty and cleaned tomato can works perfectly), cut three strips of parchment paper about
8 inches wide and about 15 inches long. Slide one into each can to line the sides. Oil the parchment and the bottom of the can well—you don’t want the bread to stick to anything.
7. Once the dough has risen, divide it into 2 or 3 equal pieces, depending on what shape you’re making. If you’re making round loaves, flatten the dough and shape into 2 disks. Scatter the fruit over each disk and massage it into the dough, then shape it back into a round. If you’re using cans, massage the fruit into the 3 balls of dough, then put them into the prepared cans. Cover the breads and let them rise for 30 minutes. No matter which shape you make, if you’re feeling fancy, you can reserve some of the dough from each loaf and make braids or other designs, which you can place on top of the loaves.
8. Preheat the oven to 200ºF.
9. When the second rise is finished, brush the egg wash on top of the dough, making sure to cover the whole surface. Bake the breads for 10 minutes, then turn the oven up to 350ºF and bake until the bread is golden and baked through—a cake tester should come out clean, 45 to 50 minutes longer. Try to avoid opening the oven during the first 45 minutes of baking.
10. Remove the breads from the oven and let them rest for 10 minutes, then carefully remove them from the cans and place on a rack to cool completely.
11. If desired, make the glaze: In a small bowl, mix together the powdered sugar, vanilla, milk, and lemon zest (if using). You can add food coloring if you want to make it more festive. When the breads are completely cool, drizzle the glaze over the breads evenly; it will harden after about 20 minutes.